Sunday, December 30, 2018

End of the Year Total and Thoughts on Army Painting

As 2018 comes to a close its time to look at how many models I finished this year. My current count is 300, which falls short of the goal I set for myself of 365. Still, I'm pretty proud of my effort. I'll probably set the same number again for next year - I think its an achievable number and even falling short is laudable.


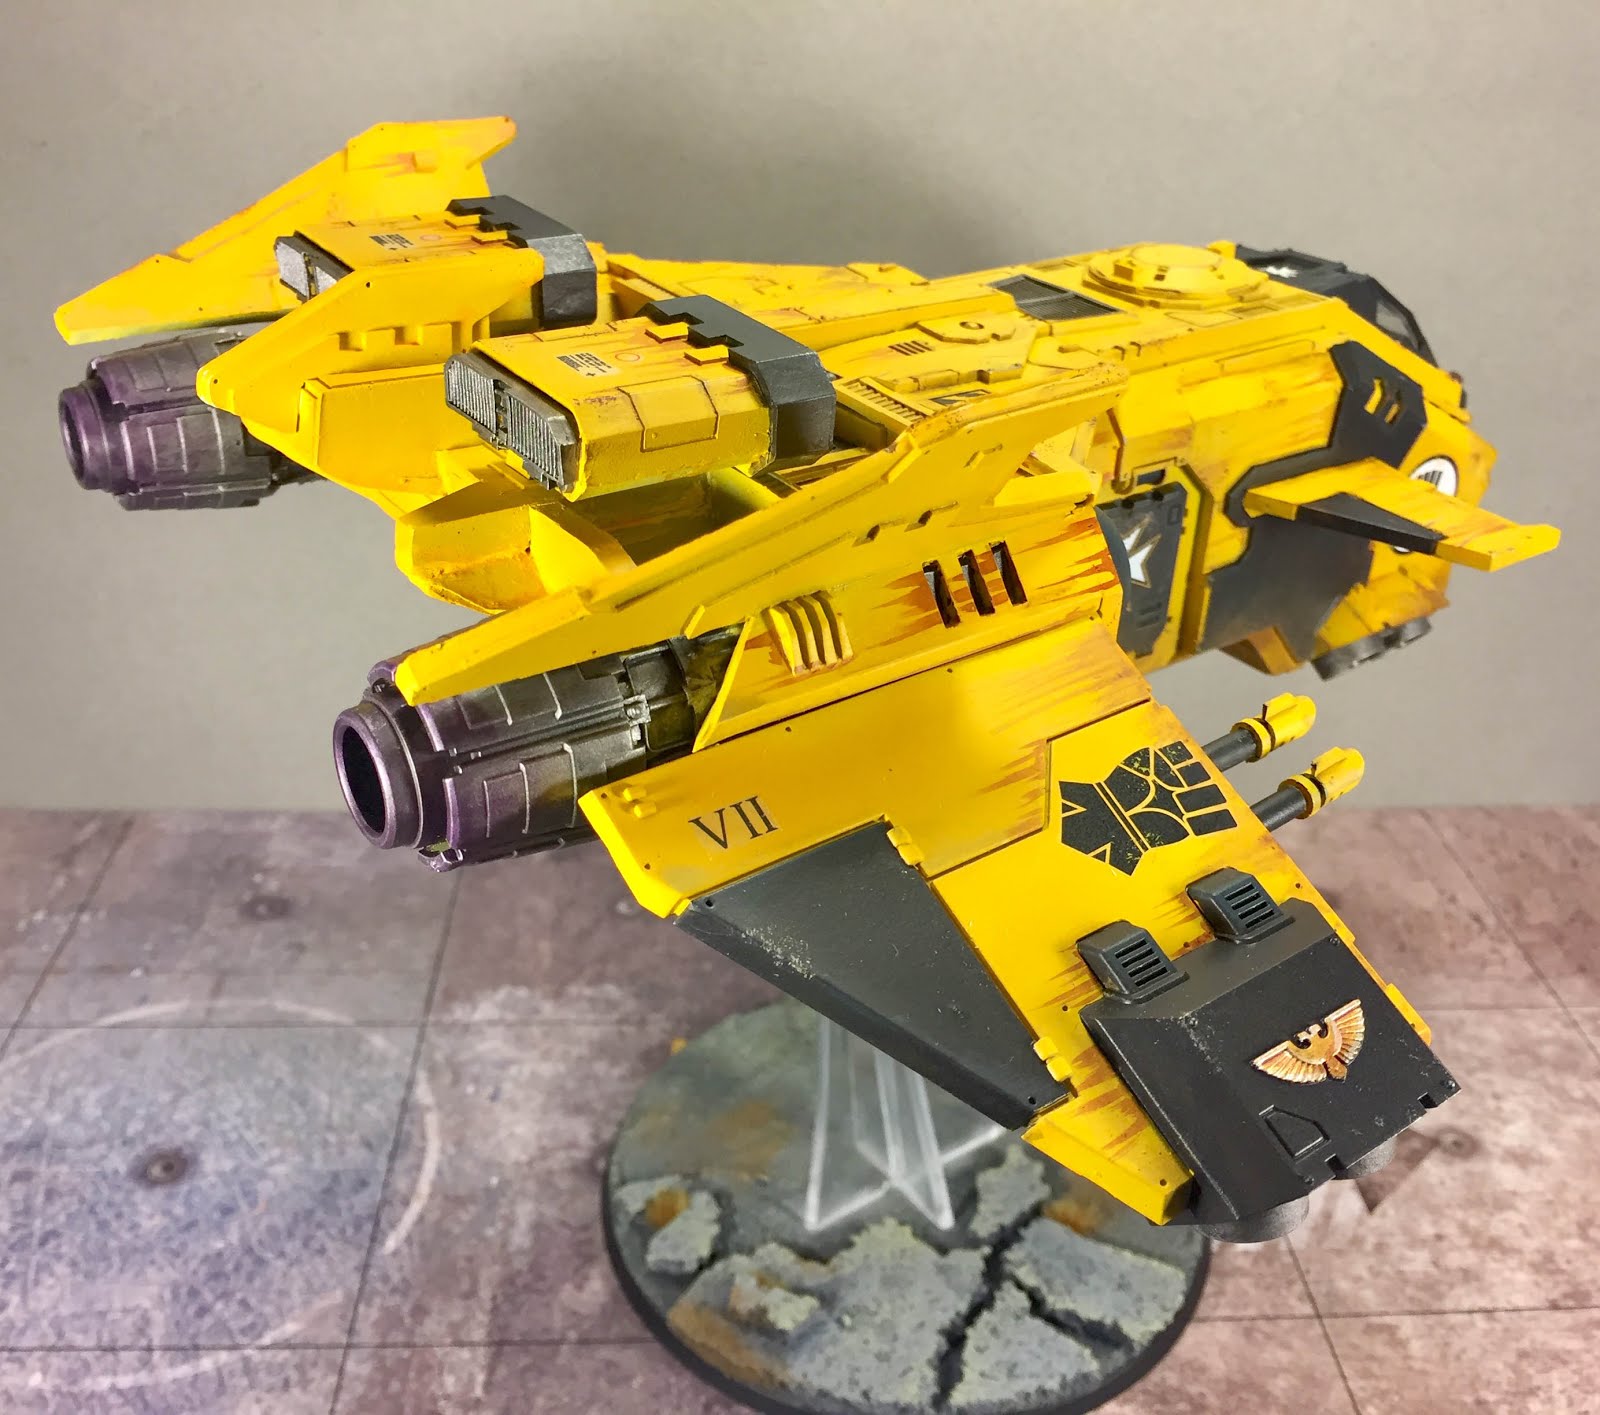
This week I finished up some more Heresy Era Imperial Fists.
I added three more Skywardens to this unit to bring me up to a six man unit.
A heroic Endrinmaster to add some nice repair options to my
Overlords.
Lately I've been thinking a lot about the processes I use to get armies painted. I've always considered myself more of an army painter than a miniature painter. Bear with me, because in my head there is a difference. While I can spend a lot of time on a single model, its always done in relation to a collection or a force for a game. I've come to enjoy the techniques and planning that is needed to complete an army and I thought I'd share some of the things I always try to keep in mind to get a painted force onto the board in a reasonable amount of time. These are the things that work for me, and maybe they'll work for you or give you a place to start.

Make a Plan 


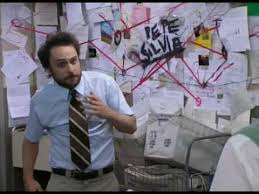
Having a rough idea of what and how much you need to paint is an essential step in painting armies. I'm not saying you need to get all Charlie from Always Sunny in Philadelphia with the intricacy, but having a roadmap generally helps me. If I'm painting a force for a particular game, I will try to make a small army list of what I'd like to paint and what will get me playing games at the most basic level. I'll certainly expand eventually, but its important to break a project down into multiple chunks. This will let you feel like you're accomplishing things and lets you get excited for the future. If I don't have a game that will help me organize a force, or I'm just collecting some models because I like the range; I'll still try to break it down into smaller goals - for example collecting an painting all the infantry before I start on vehicles. What's important is that I'm not setting out to own it all and have it painted at once. Its just too overwhelming.

Consistent Techniques


A while back when I was working on my Kharadron Overlord army, I was showing off some work in progress shots on Twitter. Someone (I forget who because I'm a monster) encouraged me to add some Cassandora Yellow glaze to my golds because they thought it looked awesome when they had done it and I should experiment some. While I'm sure it gives a nice result, there was no way I was going to change the recipe I had used for the gold armor for 75% of an army at this stage. Maintaining a consistent look and color palette is essential for army painting.

This isn't to say you shouldn't ever experiment - by all means do so when you're working on a one-off model or a trying to nail down a test model for an upcoming army - but once you've started painting a force, its time to make sure that you're approaching your paint application consistently. This consistency unifies the overall look of an army. It also saves you a huge amount of time if you aren't approaching every new model for the force like its a blank canvas.

Even armies that are painted neatly with no shading or highlighting will look unified and cohesive if you use the same colors across the whole force. Far too often, I see armies where its obvious that new techniques were learned or tried half-way through the process. The force looks disjointed and messy because some models are simply painted while others have more advanced paint jobs. Aim to have everything on a similar level. If you're going to change techniques you need to go back and spruce up the older models in your collection.

Maintain a Consistent Painting Schedule 


I was gonna start this section with a list of reasons why people don't paint, but in the end those reasons don't matter. What does matter is that if you want a fully painted army, really want one, you'll make it happen. We all make time for the things that we enjoy or are important to us. Or we should. Completing armies is a commitment I make to myself and in many ways is a form of self-care. I want  something to be proud of at the end of a lot of effort and I make time to paint.

Maintaining a consistent painting schedule is an essential part to how I complete war-games armies. It helps with sticking to a plan by not changing my army's composition because I haven't painted in a while. It helps with maintaining consistent techniques because I'm not having to remind myself how I painted something several weeks or months ago. Momentum builds and its easy to stall out and get distracted or start new projects if I'm not doing a little bit every chance I can squeeze in.

I'm lucky that I enjoy painting. That its a form of relaxation for me. I get it if it isn't for you - and if its not, you should not spend your precious free time doing something you don't enjoy. But, if you really want a fully painted group of toy soldiers you have to commit to doing a little as often as you can. Thirty minutes a day. Once a week. Whatever you can schedule, because you need to maintain that momentum.

In Conclusion


There's a lot of other stuff to cover, but I think these three main points are the best advice I can give to anyone painting an army. The rest is mostly technique and color theory, and that requires patience and practice.

Happy New Year to all, may your brushes keep their points and your dice roll sixes!

Cheers!

Sunday, December 16, 2018

Stormeagle and Heresy!

Whew! I've been neglecting my little corner of the inter webs for quite a while lately! While I've been busy with some travel and a personal life, I have still managed to paint and even *gasp!* play a game! Waaaay back in May I treated myself to a Forgeworld model for my Heresy Era Imperial Fists - the stalwart Stormeagle Gunship. In preparation for a big game against a friend who already had a flyer, I lit the fire under my ass to get the big craft done.

This thing is MASSIVE. I was seriously intimidated by this thing and the reputation for it being difficult to build.
I put off working on it for so long due that rep. In the end, it was no more or less difficult than any other resin kit
I've ever built. I just went slow and steady and didn't rush the process.
I replaced the regular Techmarine head with a MKIII helmet to fit with the rest of my Imperial Fist army.
I'm super happy with how this all turned out - its an awesome model in-game and a stunning centerpiece to my force.
I think I pulled out every trick I know for weathering, decals and freehand on this cat.
I even broke out my airbrush to basecoat and pre-shade this mutha!
It took me about a week and a half to assemble and paint - and I finished up just in time to square off against the forces of the traitorous Emperor's Children! For this game, we broke out all the toys and decided to play a Blitz mission where the Imperial Fists would be trying to crack the defenses of the Emperor's Children. The game was a lot of fun and resulted in massed carnage!

Initial deployments. The Emperor's Children are deeply fortified ready to fight in depth. 
The Imperial Fists prepare to launch an all out assault on the front lines!
Uh-oh! The enemy has a flyer of their own! A Fireraptor Gunship ready to bring the pain!
Massed Traitor forces stand ready to repel the attackers!
The bombardment commences! The Imperial Fists begin their inexorable advance!
The Stormeagle screams forward, ready to disgorge a wave of assault units.
Sword Brethren and the Command Squad launch an attack after the Stormeagle is blown out of the sky! I got one turn out of it!! Thankfully, the mission allowed me to recycle destroyed units, so I wasn't too salty. (OK, I was PRETTY salty!)
The Fireraptor ploughed into the Fists' line, living up to it fearsome reputation. A withering hail of lascannons and a stray Demolisher shell soon sent it crashing into the ground!
Eventually, the Imperial Fists over-ran the first line of defenses. Digging in, they were nearly impossible to move!
The Emperor's Children held on to their final redoubt, but it wasn't quite enough to ensure victory. The Loyalist forces carried the day, but just barely!

This was the game of Horus Heresy/40k that I've wanted for a while - it looked amazing and there were some real back-and-forth moments (as displayed by how uptight two guys "playing for fun" were sometimes getting!). Its given me a bit of a passion for more Heresy stuff. We are already planning our next game and badgering away on more forces. 

I'm so close to finishing a third Tactical Squad to bulk out my forces.

Welp, I'm gonna try and be better at updating here - wish me luck! 

Cheers!


Tuesday, November 27, 2018

Titans of the Legio Mortis

I haven't updated in a little bit, but thought I'd share the finished models for my other Adeptus Titanicus force - an Axiom maniple of the Legio Mortis.

The Legio Mortis brings death to the enemies of the Warmaster!

I actually managed to get in a small game the other day. It was a simple meeting engagement between two scout forces and saw both sides' Warhound Titans taking a beating. The game ended with one of my Warhounds rushing a Reaver Titan just in time for its reactor to overload. The Warhound exploded for maximum damage and blew the unhurt Reaver apart as it died.

The entire maniple ready to do battle.
The Warhound Lupus Venandi. These kits are a dream to paint up. 
And Warhound Lupus Umbra. Both kits are magnetized so I can
swap out the weapons into multiple configurations. 
Next time should be some hot Horus Heresy action. Stay tuned!

Cheers!


Monday, November 5, 2018

The Legio Gryphonicus Walks

The Warhound Titan Lupus Rex leads the way into battle!
This past week I finally put the final touches on the Warhounds and Knights of my Legio Gryphonicus force for Adeptus Titanicus. This means that I've completely painted the Grand Master Edition of Adeptus Titanicus and that I only have a pair of Warhounds for the Legio Mortis left to paint! The excitement is palpable.

A complete Axiom Maniple of the Legio Gryphonicus walks! Let the enemies of the Omnisiah tremble with fear!

First on deck were the new Warhound Titan kits. These are absolutely fabulous kits - just the right level of detail and complexity. A total dream to build and paint - my favorite kind of model!

Warhound Canis Dente ready to hunt. As with the other kits, every
weapon option is fully magnetized.
These models have a great sense of motion while still maintaining
a feeling of weight appropriate to a multi-story engine of war.
Warhound Lupus Rex armed with a Plasma Blastgun and an Inferno Cannon. 
The glow of plasma coils is always fun to paint!
I really dig the sculpted on scroll-work. 
Once the pair of Warhounds was done, all that was left was the Knight Banner. Ever since painting a trio for the Legio Mortis force, I've been absolutely dreading assembling and painting these models. I committed to get it done with a quick, neutral paint scheme that would put them on the table fast and not clash with the War Griffons. I settled on a grey and white scheme and just got them D-O-N-E. It was a relief to have them finished.

A Banner of House Kurg Knights ready for battle!

I also made some time to expand my scenery collection by downloading some paper craft buildings for the game Dropzone Commander that are available here for free. I scaled them down by about 20% and printed each on cardstock. I like the addition of these buildings because their high will let me use the cover rules more and means that every game won't devolve into two forces just pummeling each other at range. 

Each building prints out as a 8.5 x 11 sheet.
I think they fit reasonably well with the plastic terrain and I really couldn't beat the price (basically just the cost of a pack of cardstock!)
The great height of the buildings means even a Warlord might claim some cover.
I think the next step is to make some highways with black construction paper. That should really tie the whole room together, man.
Next steps are to complete my Legio Mortis force and then play some more games of Adeptus Titanicus. 

Cheers!


Saturday, October 20, 2018

Reavers Ready to Roll

The forces of the Legio Gryphonicus and the Legio Mortis grow!

This post sees all my Reaver Titans finished and ready to go for Adeptus Titanicus. Hooray! I couldn't be happier. The Reaver kits are very nicely done, but just a bit more of a chore to assemble than the mighty Warlord Titans. I guess this goes with how I enjoy painting models more than building them - I found the work of magnetizing the weapon arms and working out the posing more of a chore than actually getting paint on the Reavers. Thankfully, these kits are a dream to paint once you've put in all the effort to assemble them.

The Titans Bellum Est Dominar and Ulalate Furoris are joined by the second Reaver, Ferro Interitus.

I did the checker pattern using a technique I saw on Twitter - I used
a stencil ordinarily used for painting finger nails! Cheap and easy to apply
it gave me a really nice base to work from. After filling in the stencil, it
was a simple matter of removing it and then neatening up everything with
a brush.
The forces of the Legio Mortis are bolstered by the arrival of the Reaver Titan, Quatuor Mortes. 
Again, I went for a pattern on the main hull. This was just done using painters
tape cut into fine strips and applied over the hull once it was painted red. Then
it was a matter of just filling in the black. Easy, peasy!

I'm in the home stretch with finishing my two maniples. I have two pairs of Warhound Titans en route and still have 3 last Knight models to do for the Legio Gryphonicus (which I'm dreading building. 21 parts. Ugh.)

Cheers!


Monday, October 1, 2018

The Great Work of the Omnissiah continues!

Forces of the Legio Gryphonicus and the Legio Mortis grow!
I've been neglectful of my blog for the last couple of weeks but still managed to get a lot painted in the meantime. My painting area is mostly consumed with titans of all sizes from the latest incarnation of Adeptus Titantanicus. Like a complete madman, I've decided to create two forces for playing AT - a Loyalist Legion and a Traitor Legion.

The Traitor Legion I chose was the "Death's Heads" of the Legio Mortis. You can see the Warlord class titan painted up here. Next up was to add a newly released Reaver Titan to the force. 

The Warlord Titan, Mors Destinarat is joined by the Reaver Titan, Ferrum Gloria.
The Reaver kit was definitely less fun for me to build than the Warlord.
Mostly because I didn't find it to be as posable and it certainly was designed
to be less easily magnetized than the Warlord kit.
I ended up gluing the power fist option in place, as it would have required
purchasing some new, smaller magnets to do it right. I'm ok with this, though.
I find the power fist to be iconic and I know I'll field at least one regardless
of its in-game effectiveness.
The other arm, however is magnetized. It required using a
power drill to create recesses to countersink the magnets. It
was quite the effort, but worth it in the end.

For the Loyalist Legion, my decision was an easy one - the Legio Griffonicus. I've wanted a War Griffon's force ever since seeing this illustrated spread in White Dwarf many moons ago. Wayne England's fantastic art fired my imagination, and while the scheme and titan patterns have changed over the years I'm super excited to have an updated force of these cats.


The initial forces of the War Griffons; the Warlord, Bellum Est Dominar and the Reaver, Ululate Furoris.

The Warlord was every bit a joy to build as the first one. I'm super happy with the yellow
- looks like painting all those Imperial Fists has paid off!

I equipped the Reaver with two gatling cannons (one taken from the first Reaver kit)
so that running intro games has some variety. 
I also painted up the Laser Blaster and magnetized all of the weapons
and arms.
Just a detail shot of his behind. (Technically called the
"Caboosium" in Imperial High Gothic)
While I didn't love assembling the Reaver, its still a
GOOD kit. My main complaints are really the lack of
easy magnetization was compared to the Warlord kit -
especially as the Reaver doesn't come with all of the
weapons options available to it.

My plan is to do two classic Titan Maniples of 1 Warlord, 2 Reavers and 2 Warhounds, so I've still got add another Reaver kit to each. I will preserve!!! 

Cheers!